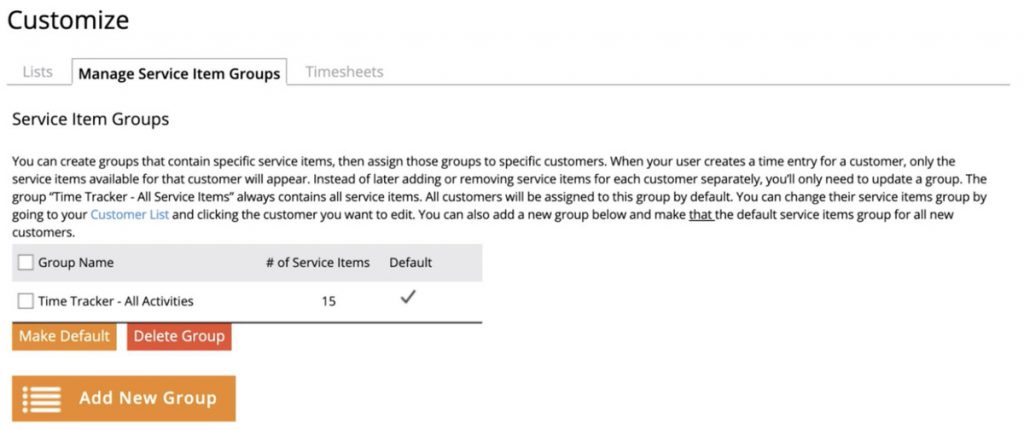
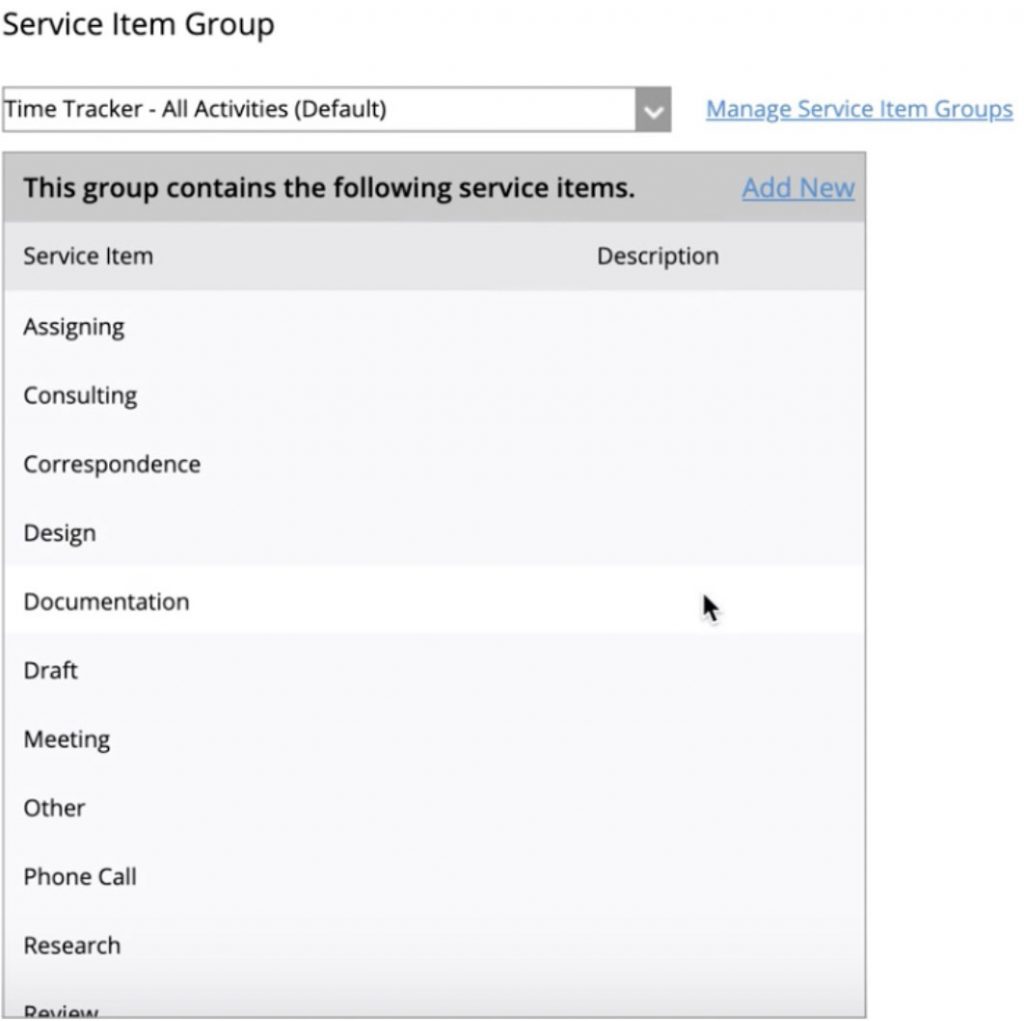
To access this new feature from the taskbar click on Admin | Customize then select Manage Service Item Groups from the tab. Click on Add New Group. Under group properties fill in Group Name. Then select the service items you want to be included in the group and click on Save.

You can also make the new group of service items the default for all new customers or projects by selecting the group and clicking on Make Default. Or you can assign the new group to a specific customer by clicking on the Customer tab (in the top navigation bar) to access your customer list. Select the customer and then click on Edit Customer and scroll to the bottom of the customer record under Service Item Group dropdown and select the group you want to assign to the customer and click Save.

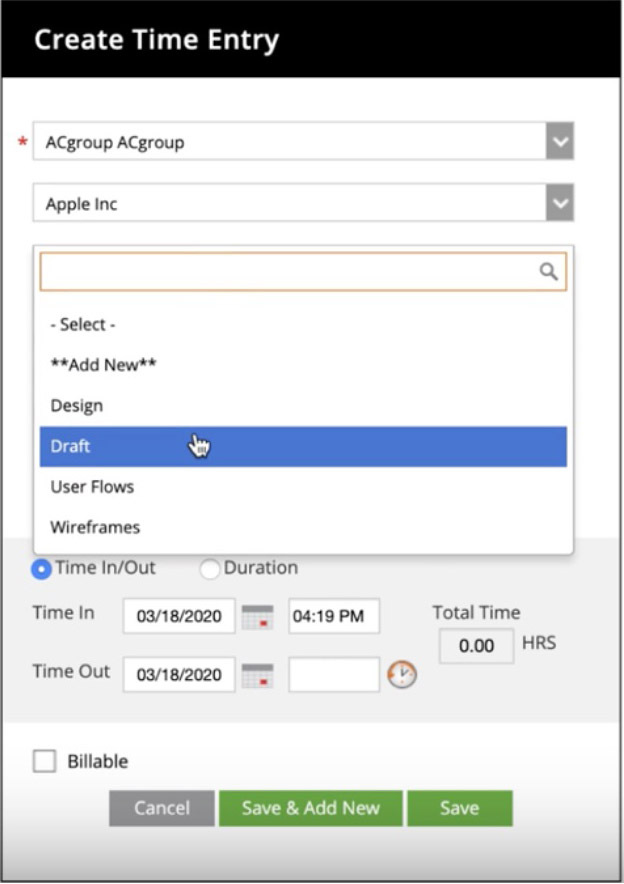
Now when a user wants to add a time entry for that customer or project they will be restricted to select the service items in that group only.

If you have any questions or need help with Managing Service Items Groups our support is always free, contact us.
*To be able to assign Service Item Groups to a Project you need to upgrade to Time Tracker +Billing. The Admin can click on their name in the top right corner to expand a list of options, from there they can upgrade to +Billing.


